I am currently working on a project for work in the lab that requires interesting functionality. The material scientists that I am working with need to heat multiple solutions for automated mixing. This new project will be an add-on to the Opentrons OT-2 pipette robot that I have used previously.
The OT-2 robot is a 3D gantry robot that has two pipettes that can be moved around inside the build space. This robot can suck up liquid from vials, bottles, and wells. It can also dispense, mix, transfer, distribute, and more using the gantry.
This machine is a very powerful tool in our lab. My first job working for the ORaCEL lab at NCSU was to learn how to use the OT-2. I worked to develop an automated sequence of mixing and spin-coating glass substrates. Now I am working with the OT-2 again to develop a new automated sequence. Opentrons calls it a protocol. This new protocol involves creating new mixtures of chemicals by mixing a two-part ratio consisting of two source chemicals. The difference with this protocol is that the source chemicals and the new mixtures need to be certain temperatures above room temperature.
Normally in the lab, a chemist would use a hotplate to heat up their source chemicals using a hotplate at a fixed temperature. Then they would heat up an empty vial on a second hotplate to the desired mixture temperature. Finally, they would use a pipette by hand to aspirate and dispense the correct volumes of source chemicals based on the desired ratio.
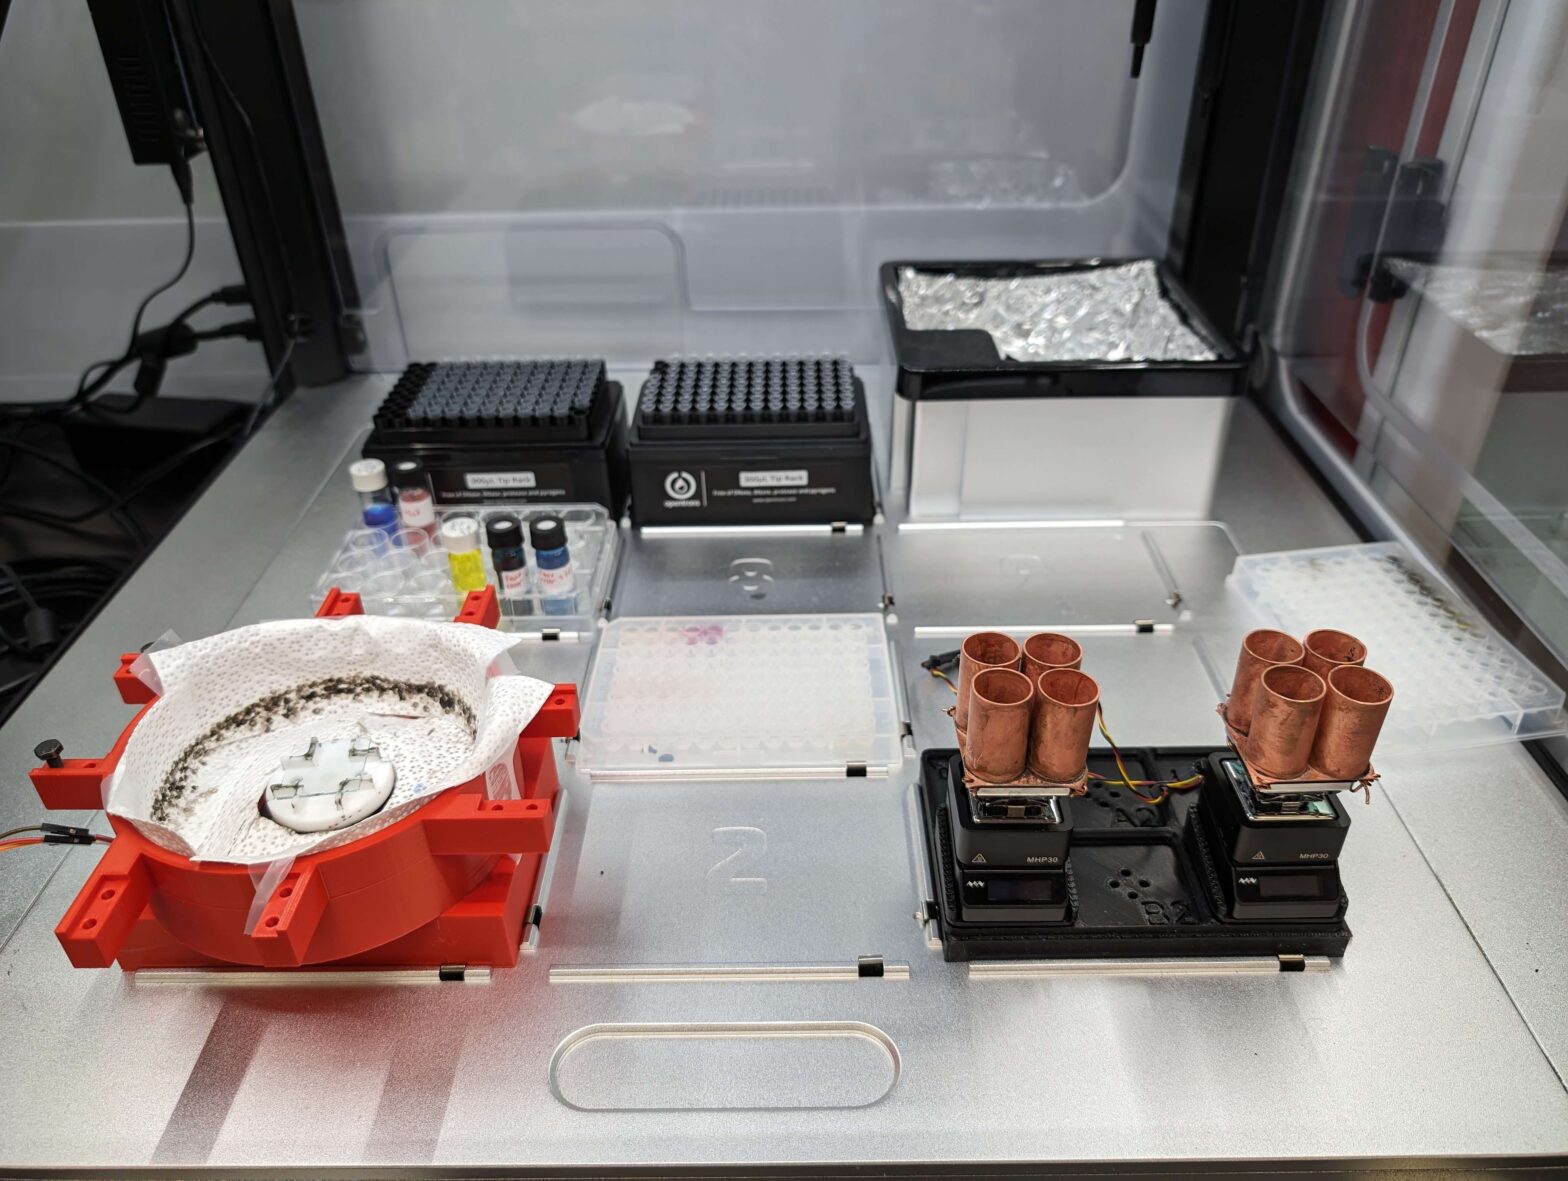
For the OT-2 automated sequence, we need to have hotplates inside the gantry. This is so the robot can do the hot solution mixing for us. This gets tricky if you want to put your hotplate inside the robot. Most chemistry hotplates are large hotplates that have physical temperature adjustment buttons.
The OT-2 build plate has sections called wells. Each well is a standard size. Here is a diagram showing a standard well plate with many wells or semicircular holes for liquids. The important size is the bottom left outline.
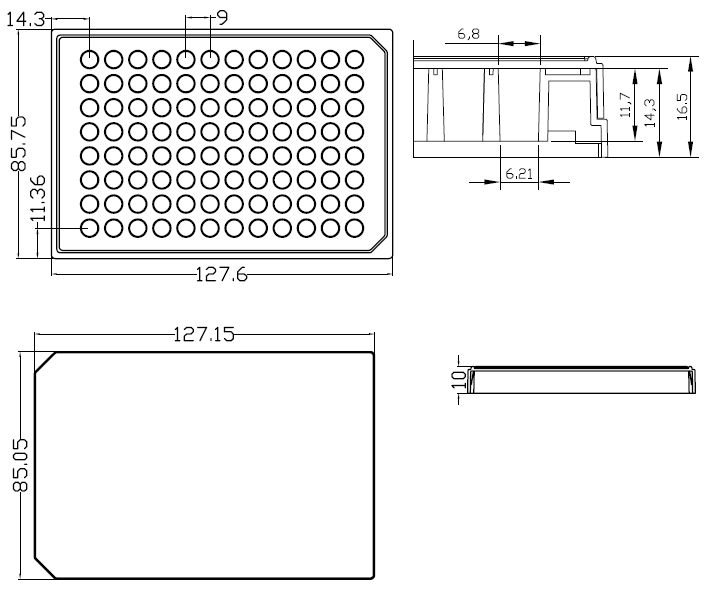
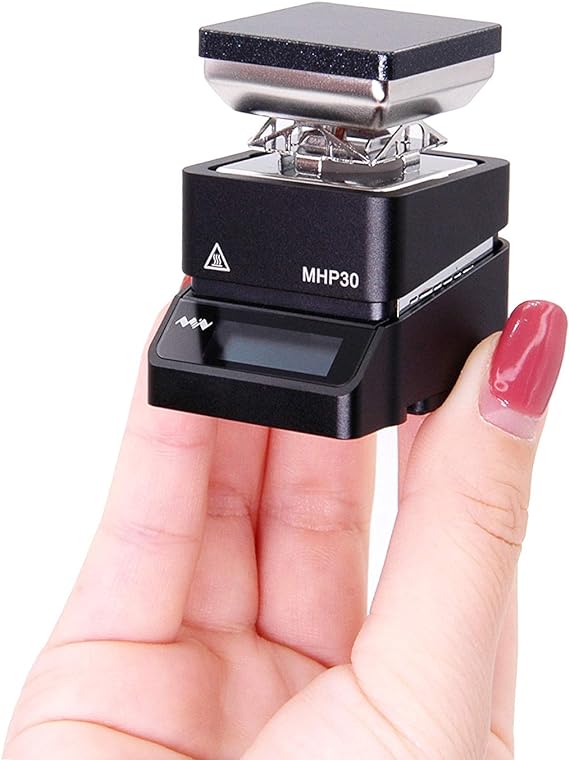
Whatever hotplate we use has to fit into 127 mm by 85 mm. This size constraint doesn’t leave us with many options. Luckily, someone has already made the perfect hotplate for our project. The SainSmart MINIWARE MHP30 Mini Hot Plate Soldering Preheating Station is a small soldering rework hotplate with a 43 mm by 35 mm base footprint.
We also required hotplates that could be computer controlled. This is significant since we want to use these hotplates for heating solutions that are stored inside vials. These solutions behave differently based on temperature when dispensed onto a glass sheet. We are trying to create an automated process with the OT-2 robot. We need to have the OT-2 be able to adjust hotplate temperatures based on the automated protocol.
The main issue with using MHP30 hotplates for this project is that these hotplates have no computer interface. They are meant to be programmed and operated with the two push buttons on the back of the hotplate. But, there is an open source project called IronOS that aims to provide replacement firmware for many cheap soldering devices that have appeared on the market recently. The TS80 soldering iron for example is very popular. A few years ago, the IronOS community reverse engineered the MHP30 to get their code working on it. This is way better than trying to figure out how to reprogram the MHP30 myself.
But, IronOS doesn’t have native support for computer control of the MHP30. The USB-C port on the hotplate is strictly for USB-C PD for powering the device and heater unit. This USB-C port runs at 20 volts USB-C PD. Unfortunately, I could not figure out a way to use the single USB-C port for data and power.
I did find another way to get data to the hotplate. There are exposed pads on the PCB that are for the I2C bus of the OLED display. Pads C and B near the STM32 chip are the SCL and SDA pins of the OLED circuit, respectively.

I worked with Ralim and Arya to write custom firmware for the hotplate that would ask for a temperature data packet over the OLED I2C bus. The hotplate behaved as the master device in the network and provides the clock signal. I used an Arduino Mega for the slave device that needs to respond with the correct temperature setting. Initially I was hoping to set up multiple I2C buses on the Mega using it’s many digital output/intput pins and a software I2C library. But, the I2C library for Arduino only allows you to use the hardware I2C bus for Wire.onRequest(requestEvent); I2C data handling.
To work around this limitation, I made a circuit board that uses two Texas Instruments CD4051BE chips. They are a 1-channel analog multiplexer with logic-level conversion. I have one for SDA and one for SCL. These chips allow you to pick 1 of 8 outputs that your input signal is connected to. You can pick which output using three data pins on the chip. It uses binary to select the output 1 through 8. These two chips let me switch which hotplate the single hardware I2C bus is connected to. I tied the address lines for the multiplexers together so they both pick the same output.
Now that all the hotplates can be controlled with an Arduino we can then control all hotplates with a computer. The Arduino is listening on the serial port for a number between 20 and 240. When it gets that number, it will start repeating it out on the hardware I2C bus. It will get sent to whichever hotplate is currently connected through the multiplexers. To change which output the multiplexers are sending data to, you can send a number between 1 and 8 to the Arduino over the serial port. The hotplates request the temperature value from the Arduino every 10 seconds. So, you need to let the Arduino sit on an output for at least 20 seconds to guarantee that the hotplate gets the temperature value.
Let’s talk about the nice picture at the top of this article. Those steampunk copper tubes, although super cool, were temporary solutions that my family made for me the day before my important demo. I had placed an order with an online prototype machining company for a metal square that would hold 4 vials. Here is a picture of the professionally machines block.
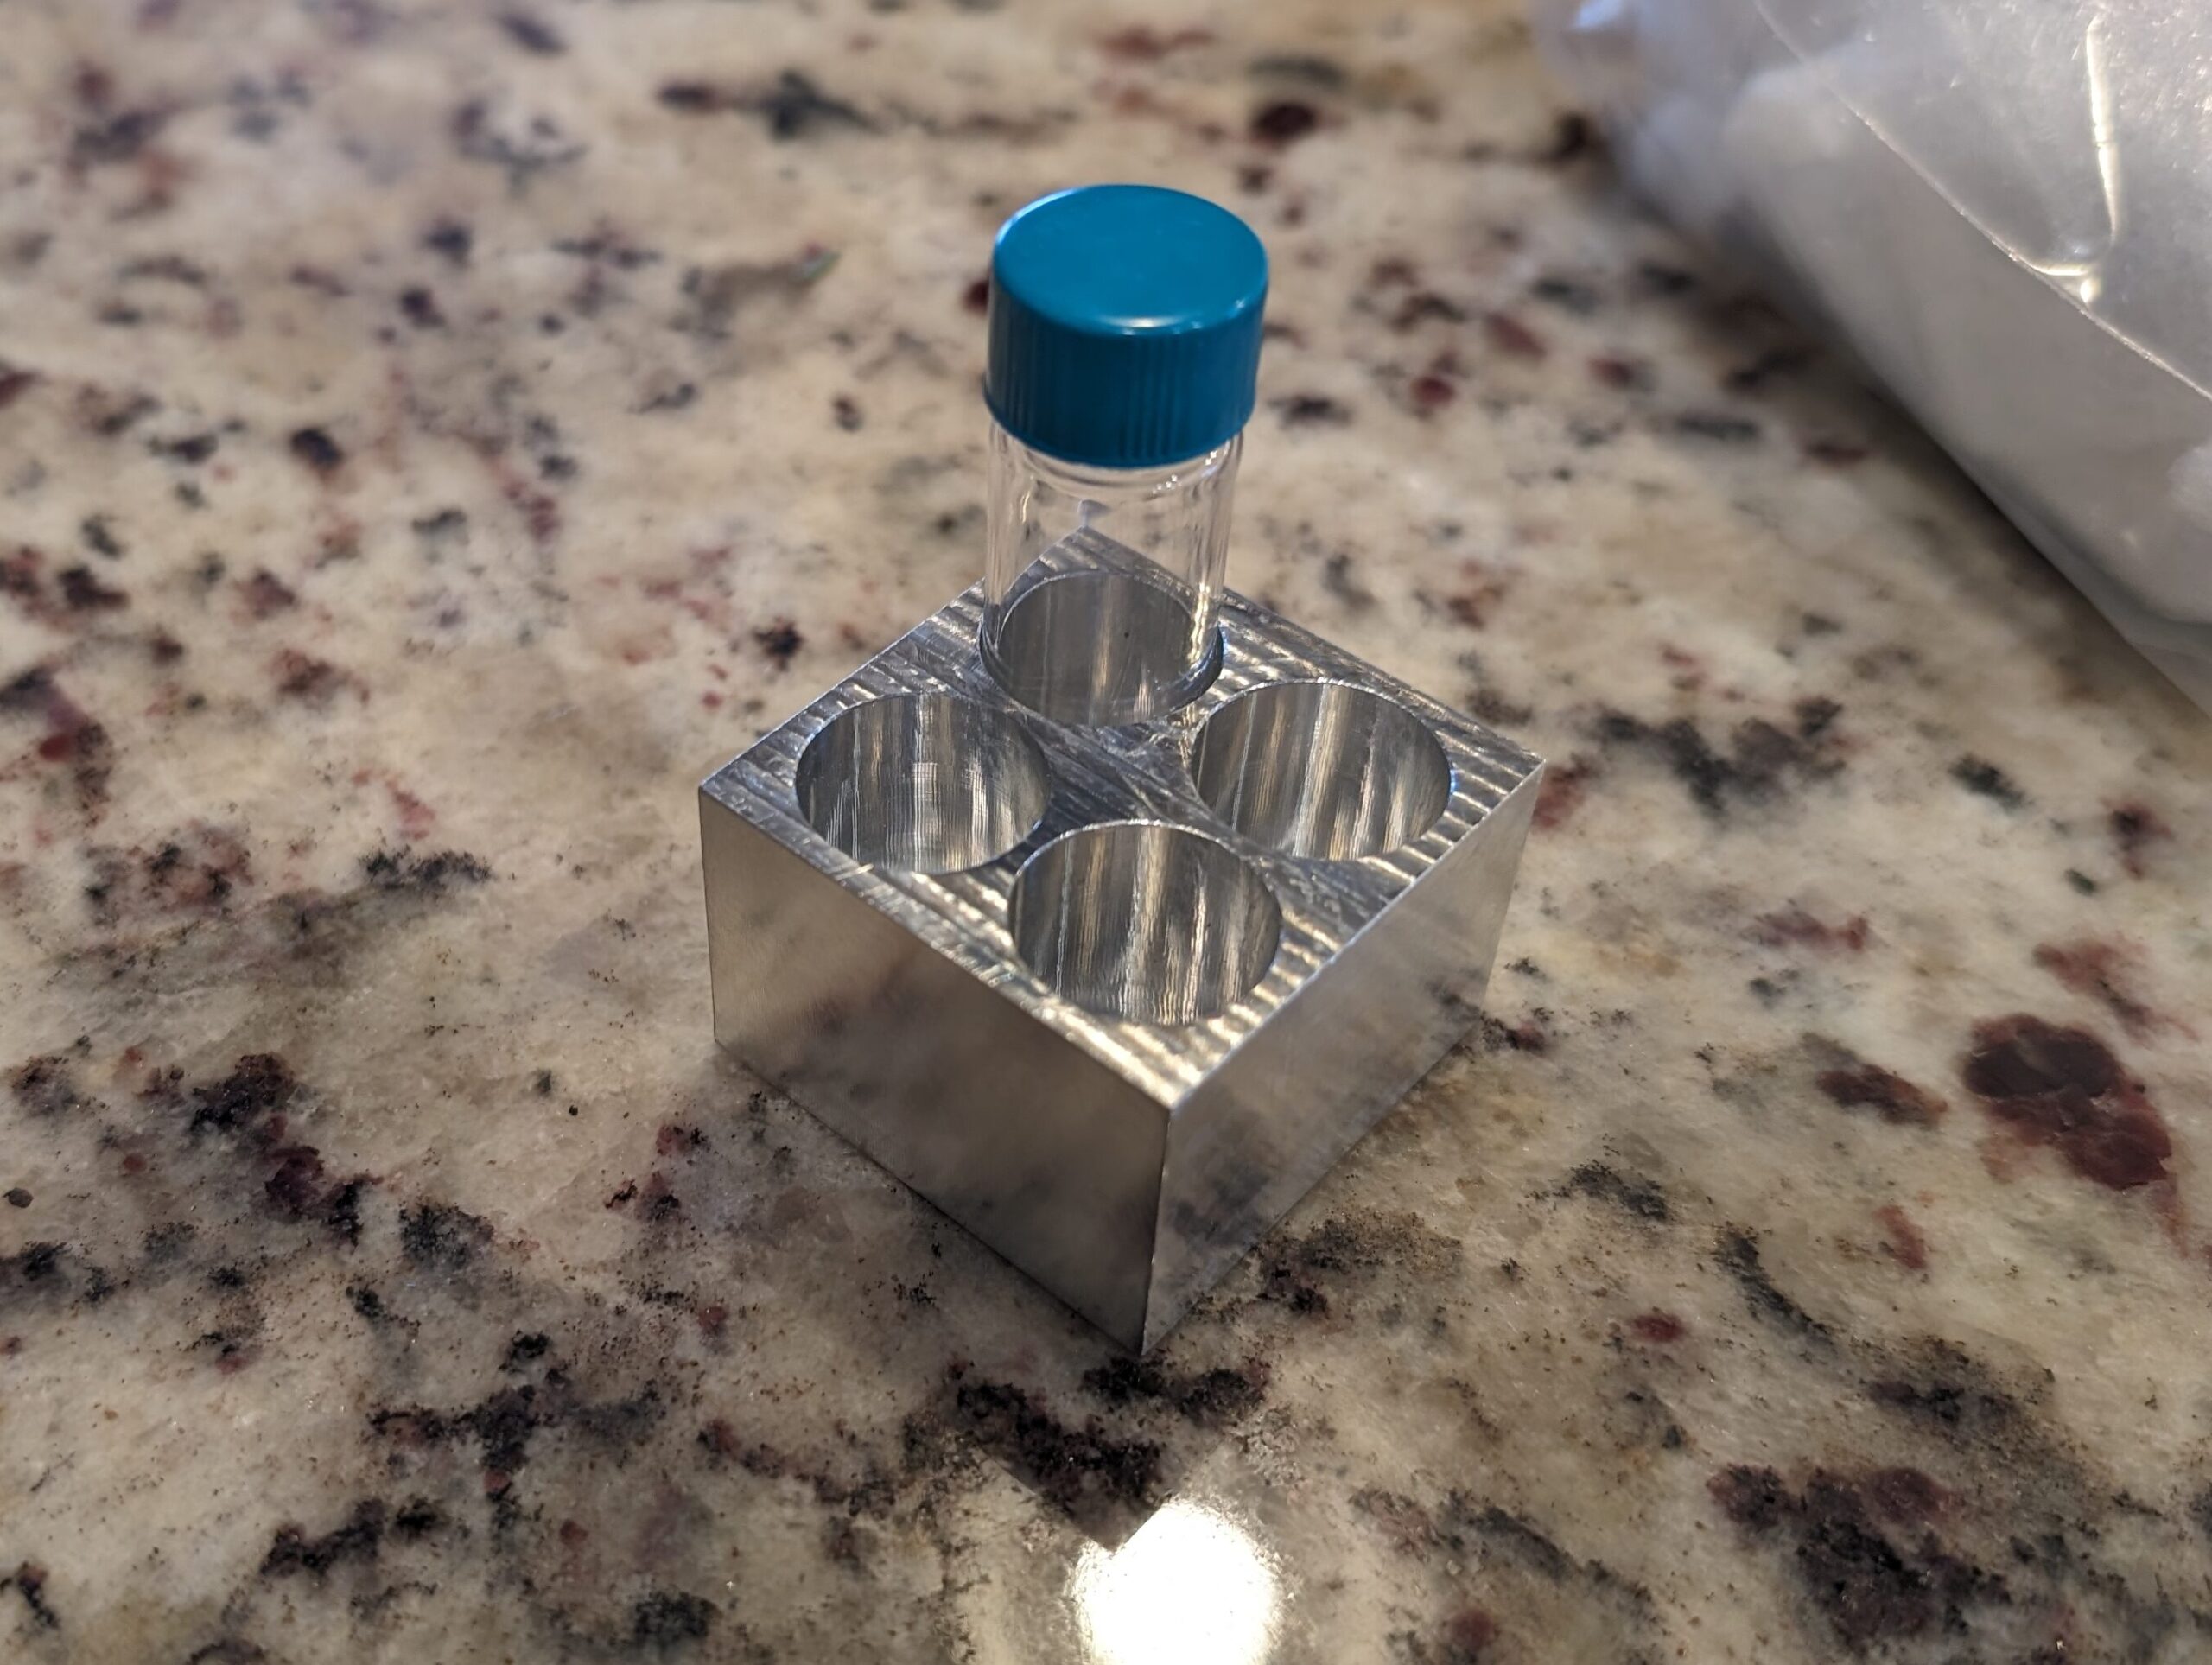
The issue is that even though I paid for expedited rush shipping. They still came late for the main demo of the hotplates in the OT-2. I am so grateful for my family that they were able to build those two copper blocks for the demo. This demo was very significant to our research group. The National Renewable Energy Lab sent some visitors to look at the robot platforms we have custom-built. Everything had to work and be in a good state to show off to the NREL. I wasn’t able to use the aluminum blocks since the demo which was originally scheduled for Friday was pushed up to Wednesday. Myself and the other grad students only learned this on Tuesday. That meant the aluminum blocks arrived after the demo. It was quite a crunch to get the OT-2 protocol ready, the hotplate code going, and the copper vial holders installed. But, I am happy to report that the demo went great, and the hotplates performed well!
